Harry Reser Ukulele Method
Page:106
Basic self instruction for ukulele - learn by playing and singing 31 popular songs, most used chords, with sheet music, lyrics and ukulele(diagrams), with pdf for printing.
| Share page | Visit Us On FB |
|
THE LEFT HAND
(A) Keep the left arm close to the side of your body. (See photos on page 3.)
(B) Rest the neck of the Uke in the crotch formed by the thumb and first finger of the
left hand. (C) Most of the time the neck rests on the base of the third joint of the first finger and
against the first joint of the thumb, (D) In order to have better contact points from which to exert greater pressure (when
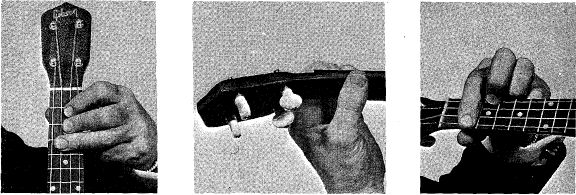
needed for some of the tricky chords) it will be found necessary to have the fleshy part of the thumb on the bottom of the fingerboard. (E) The fingers must press the strings down almost at right angles to the fingerboard in
order not to touch any of the adjacent strings and thereby cause a "buzzy" tone. Believing that pictures tell a story better than paragraphs of explanation, examine carefully the following poses: 1 2 3
|
|||
 |
|||
|
FINGERS NOT ARCHED CORRECT THUMB POSITION CORRECT POSITION OF
LEFT HAND
Picture No. 1. This "wrong way" picture illustrates the need for keeping the fingers
arched when playing single tones. When two or more notes are to be pressed down on adjacent strings by the same finger and on the same fret, it calls for a flattening of that finger as shown and explained below under The Bar (Barre). Picture No. 2. This illustrates the position of the neck resting in the left hand.
Picture No. 3. When "barred" chords are to be played, more pressure is needed. This
illustration shows the position of the thumb and fingers for such a chord. |
|||
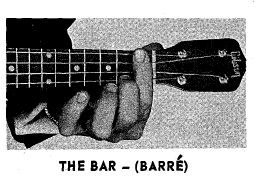 |
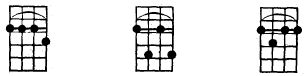
A "bar" is made by the fingering of three
or four notes across the same fret. There are many chords that call for the use of the bar even though all of the notes so formed do not sound. Here are a few examnles: |
||
 |
|||